Payload Altitude
 OVERVIEW
The purpose of this event is to carry a specified and standard-size payload to the highest possible on a specified amount of total impulse. The rocket may be single or multi-staged. The payload needs to be completely enclosed in the model, and remain inside the model from launch to return. The model must be returned after flight and the payload inspected by an official. Nothing can be permanently attached (i.e. glued) to the payload.
For the full rules for this event, please see the Payload Rules in the NAR Model Rocket Sporting Code.
SCORING
The rocket that goes the highest is the best single flight of two allowed attempts wins.
GENERAL TIPS
by Trip Barber, NAR 4322 and George Gassaway, NAR 18723
Payload Specifications. To quote the Model Rocket Sporting Code, rule 22.3:
“The standard NAR model rocket payload is a sealed non-metallic cylinder containing fine sand, with a mass of no less than 28.0 grams. This cylinder must be a minimum of 17.0 millimeters in diameter, and a minimum of 60.0 millimeters in length. No holes may be drilled into it, no changes made in its shape, and no other material may be affixed to it.”
No need to grab any calipers — here’s what this effectively means. The payload diameter fits inside a BT-20 body tube.
The keys to this event are minimum body size, minimum drag, proper motor selection, and minimum weight.

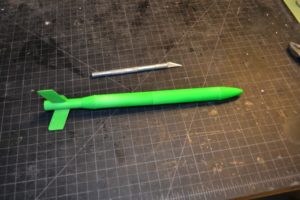
Minimum Body Size. Always use the smallest body diameter that will contain the payload and the motor or (if staged) motors that you use. Then use the minimum body length that will contain the motor, the payload, and the parachute. This will minimize the frontal area and wetted surface area of the rocket, minimizing its drag.
Minimum Drag. Put the best surface finish on rockets for this event that you kn
ow how to do. Use a nose cone that is parabolic in shape with a length-diameter ratio of 2 or 3 to 1. If the nose cone is balsa, user filler coat, sanding sealer, or Elmer’s wood-filling paste to completely fill the grain and polish it with at least 600 grit sandpaper to make the finish mirror-smooth. Pay close attention to the nose-body joint to ensure that it is smooth. Sand the surface of the body tube to ensure there are no ridges from any spiral winding. Use thin waferglass for the fins, or if you use balsa use thin material with the same techniques as the nose to ensure a smooth surface finish and put a good symmetrical airfoil on the fins. Use a fin jig to put the fins on absolutely straight so the rocket does not spin during its upward flight. Do not make the fins very small even if computer programs tell you that you can and still have a stable rocket; the heavy payload in the nose requires some fin area to make the rocket “dynamically” stable. Make the shock cord mount internal so there are no protrusions on the surface of the body. Use a piston launcher or a tower launcher (or a piston inside a tower) to permit leaving off the draggy launch lug or rail buttons.
Motor Selection. The best motor selection for this event is one with low average thrust, the smallest possible diameter (for higher power classes where the motors are larger in diameter than 18mm), the highest total impulse that fits within the power class being flown, and a long delay time. If you have a choice between an 18mm motor and a 24mm motor for this event, always use the 18mm motor. Staging is generally not advantageous unless it permits you to use a smaller body diameter than single-staging, without sacrificing total impulse (i.e. staging two 18mm diameter “C” motors vs single-staging one 24mm diameter D motor with the same total impulse as the two C’s together). The optimum thrust for maximum altitude is twice the weight of the rocket, i.e. low; a D6 will go much higher than an D20 of equal total impulse because the rocket with the D6 will travel at a lower average velocity and drag goes up as the square of velocity so low velocity equals lower drag equals higher altitude for the same total impulse. However, don’t go too low on the average thrust in the lower power classes, because you need to get off the pad fast with a heavy payload so that the model does not weathercock in wind. Payload models tend to need long coasting times after motor burnout in order to reach their maximum feasible altitude, so always use a long delay time for the motor type you choose.

Optimum Weight. Every rocket has a weight that leads to optimum altitude performance for that design. If the rocket is too light, it will not have enough momentum to coast as far as it could have after motor burnout, as it turns the velocity it achieved during motor burn into altitude. If the rocket is too heavy, it will not reach as high a burnout velocity as it might have done if lighter, and therefore will not coast as far. Flight simulation programs such as Rocksim or OpenRocket permit you to determine what this “optimum” liftoff weight is for your particular design and this is what your rocket should weigh, if possible. In general, this optimum weight is lower that it is possible to achieve for C power class and payload designs, so weight minimization in your design and construction is important.
Other Considerations. If optical tracking is being used to determine altitude, use lots of tracking powder (keeping the optimum liftoff weight in mind) so that the people doing the tracking can see the point of ejection, which is what they track to. See the tip page on Tracking Powder for more information.
If altimeters are being used to determine altitude score, use the lightest available altimeter that is approved for contest use by the NAR Contest Board.
KITS
–No-Part II kit (A through C) – Qualified Competition Rockets
–Versi-Loader kit (B – C) – Aerospace Specialty Products
–Payload kit – Aerospace Specialty Products
Related Documents:
| Altitude & Payload Events (Wolf) | May 28, 2014, 8:43 pm | 3 MB | |
| A-B Payload for 13mm Motors (Wolf) | January 29, 2020, 2:16 am | 597 KB |