Budget Rocketry
ENGINE BLOCKS
You can make engine blocks from used engine casings or the yellow engine spacing tubes supplied in kits. I can make eight, 1/4″ blocks from a casing before it gets too short to control the cuts.
Mark the casing 1/4″ from the end. Continue the line around the casing. Cut with a razor saw. Sand the ends square with a sanding block and 220 grit sandpaper.
ENGINE MOUNTS
To fly a 13mm engine in a 18mm engine mount –
Make an adapter out of a used engine casing. Take a used 18mm casing, knock out the nozzle and burnt debris. Depending on the engine power (A, B or C) the inside diameter of the casing may differ.
Try sliding a 13mm engine inside the casing. If it is too tight, glue some 150 grit sandpaper around a 1/4″ dowel. Sand the inside of the 18mm casing until the 13mm engine slides in easier. Friction fit the smaller engine in the adapter with masking tape.
The same techniques could be used to fly a 18mm engine in a 24mm model. Try fitting an A, B or C sized engine into a used D sized motor casing.
CARDSTOCK FINS
If you haven’t made fins out of laminated cardboard yet, you might be surprised at the great results.
I started making fins this way after building a few carded rockets. Carded rockets are made using 60 – 110 lb. card stock to roll body tubes, make fins and nose cones.
While my results are mixed when making carded body tubes and nose cones, I’ve been happy with the way fins turn out. You won’t be able to make an airfoiled fin or round the outside and trailing edges. But the leading edge ends up rounded. The outside and trailing edges will be square.
The fins are a triple laminate and can be used on BT-5 and BT-20 sized models.
(Layer 1) 110 lb. cardstock, (2) cereal box cardboard and (3) 110lb. cardstock. This 3 layer laminate will end up being close to 1/32″ thick.
Save cereal or cracker boxes. Cut the boxes into “flats”, saving the biggest pieces, the front and back of the boxes. Sand the printed side of the cardboard (use 220 grit) to remove some of the ink and gloss finish. This will help the glue adhere better.
Design your fin and cut out a template. Trace it onto the 110 lb. stock. Flip it over, matching up the leading edge. Leave a little space along that leading edge line to allow for the fold over the cardboard inside the laminate skin.
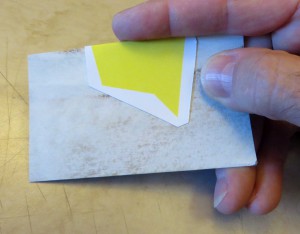
You can pre-crease the leading edge with a dull butter knife tip and a straight edge. Fold the fin on the leading edge. At this point, the fin overlay might remind you of a butterfly wing. Two opposite, matching halves folded in the middle.
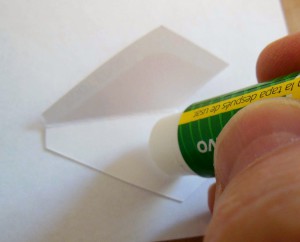
Cut a piece of the cereal box larger than the finished fin will be. The leading edge should be cut against a straight edge. Use a glue stick to apply a thin coating of glue on one side of the 110 lb. overlay. Lay the leading edge of t he interior cereal box piece up to the fold in the overlay piece. Press evenly over the entire fin half. Lay a light glue coating over the other half of the overlay and fold it over onto the cereal box. You will now have a three layer fin. The oversize cereal box board will be sticking out beyond the overlay edges.
Let the fin dry a few hours inside of a heavy book. Use wax paper on either side of the fin so it won’t stick to the book’s pages. Take the dried fins from the book and trim around edges of the overlay.
To prevent separation, apply a glue bead along the fin edges. The rounded, folded leading edge won’t need the glue.
EJECTION PROTECTION
Commercially produced wadding is expensive!
Fireproof Cellulose Insulation (“Dog Barf”) is a great, inexpensive alternative. You can buy a bale at Home Depot or Lowe’s in the home insulation department. It’s cheap, biodegradable and a single bale could last for years! When using Dog Barf, I pack my rockets with 2x the body diameter.
Some modeler’s push one square of Estes style wadding into the body tube and follow up with the Dog Barf.
For extra insurance, wrap the lower half of the parachute in one smaller square of Estes style wadding.
Flameproof Crepe Paper streamers are another cheap wadding material. You can buy flat crepe sheets online or at some party stores. One rocketry forum contributor buys party streamer sheets and folds it into 4″ strips. Cuts at the folds to make “packable” sized squares.
Test all crepe paper wadding before use to see if it is actually flameproof.
EJECTION BAFFLES
If you fly a favorite model often, ejection baffles could save you money in the long run.
Semroc (www.erockets.biz) offers fibreboard BT-55 sized baffles. The design incorporates centering rings with offset holes in them. They are glued to a (vented) cone shaped centerpiece. Simple, well designed and lightweight.
When the Semroc baffles get larger, they switch to offset body tubes mounted on plywood rings.
Fliskits (www.fliskits.com) offers the smallest baffles, down to a BT-20 size. The largest baffle they make is based on the older Centuri design.
MAKING YOUR OWN PARACHUTES
You can make your own parachutes out of colored plastic tablecloth sheeting from party stores.
Another chute material is black garbage bags. Most commercially made parachute canopies are 1 mil. or thicker.
NOTE: Black garbage bag parachutes are prone to get warm under sunlight and can thermal away!
Get plastic (not paper) permanent reinforcement rings at office supply stores. For shroud lines, look for thick rug or button thread at fabric stores.
ELASTIC SHOCK CORD MATERIAL
Buy your elastic shock cords at fabric shops or the craft section at WalMart.
NOSE WEIGHTS
I’ve used small lead fishing “sinker” weights. You can find them nearby the snap swivels in the fishing department of a sporting goods store. You can also use lead shot or BBs for a BB gun.
Sometimes I’ll hollow out a balsa nose cone to glue the lead weights inside. Drop in a few weights and drip some epoxy glue (over the weights) inside the nose cone tip.
Modeling clay weight can be pushed into a plastic nose cone and pressed in place with a dowel.
BODY TUBES
I build scratch models using the thicker “ST” (older Centuri style) tubing. The Estes “BT-20 and BT-50” tube walls are thinner, nowhere near as strong.
ST-5 wall thickness is .013″ BT-5 wall thickness is .013″ No difference!
But at ST-7 and larger diameter (BT-20 equivalent and above) the ST Tube wall thickness is .022″! At Series 10 size or ST-10 the thickness is .020″ All larger ST (Centuri) tubing stays right around the .020″ thickness.
The Estes style (BT designation) stays at .013″ wall thickness until they reach the BT-55 size. The BT-55 is thicker at .021″. All larger Estes BT tubes are at the .021″ thickness.
Using the “ST” designated tubing, your rockets will be structurally stronger and last longer. The thicker walled tubing is less likely to dent, crimp and buckle.
Personally, I’ll pay a bit more for stronger tubing. The thicker ST tubing is great for sport models. The thinner BT tubing is lighter and better for competition models.
Good rocket building comes with perseverance. Remember – Practice makes close!
Thanks for reading and I hope you’ve picked up a few new techniques and ideas.
Feel free to email me with your thoughts – good or bad!
Hans “Chris” Michielssen
oddlrockets@bellsouth.net
www.modelrocketbuilding.blogspot.com
