Filling Seams & Balsa
TO FILL BODY TUBE SEAMS
Even though you may not be able to see the tube seams initially, they will show up when the rocket is painted. Run a fingernail over the body tube and you will feel them.
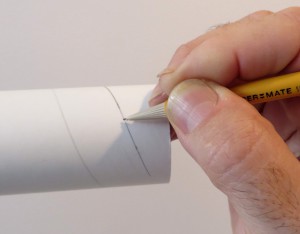
TIP: You can run a sharp pencil down the seam lines to see them easily when filling white or brown tubes.
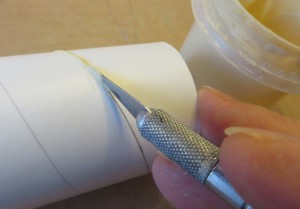
Dip just the tip of an old knife blade in thinned CWF. Wipe off the back side of the blade on the jar lip. You’ll only need the amount of CWF filler on one side of the blade.
 Set the coated blade tip in the seam and drag it back and forth. This directs the CWF into the seam. Work about an inch at a time. Re-dip and repeat until the entire length of the tube is filled.
The launch lug seams can be filled by simply painting over the lug with filler and sanding smooth. Be careful not to get filler inside the lug!
Allow to dry a few hours before sanding with 400 grit.
Any remaining seam recess will be filled with primer filler before painting.
FILLING BALSA GRAIN
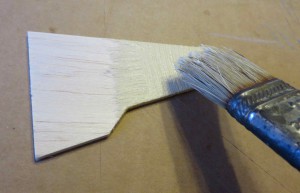
Use a cheap 1″ utility brush with CWF. They typically sell for $.50 in the paint department of Home Depot or Lowe’s.
You can fill the fin grain before gluing to the body tube. You can’t effectively fill balsa pores after the fins are glued on the body tube. White glue doesn’t sand well! You can also fill the nose cone before installing the screw eye and attaching the parachute.
Dip the brush about 1/4″ into your thinned CWF and paint the balsa with the grain, then against it. Going against the grain forces the filler into the open pores. Paint over one side of the fin for now, let dry a few minutes before painting the other side.
CWF or Sanding Sealer can warp thin balsa fins. Usually when the other side of the balsa is painted with filler, it will flatten out again. Be sure to apply filler to the leading, outside and trailing edges. Keep the Root Edge clean for better adhesion to the body tube. Let the CWF dry a few hours before sanding. A CWF brush cleans up easily with water.
NOTE: Wood surfaces treated with Carpenter’s Wood Filler are not sealed! Even when dry, CWF can still be broken down with water. Surfaces aren’t really “sealed” until after the first spray coats of paint.
Sand the flat sides of the filled fins with 400 grit sandpaper on a block. Sand the rounded fin edges with a small piece of 400 grit sandpaper rolled over a fingertip. In the end you’ll want the balsa surface to have a overall thin skin coating of the CWF.
FILLING BALSA NOSE CONES
Again, use the cheap utility brush. Put a layer of masking tape on the nose cone shoulder. Brush on the filler from the tip down to the shoulder. Try to push the filler into the grain pores.
When sanding the cone, try not to sand too far into the balsa surface. Again, CWF works best if there is a very thin beige coat left on the surface after sanding.
FIN FILLETS
Fin fillets can be done using the Titebond Molding and Trim Glue. It’s thicker than white glue and can fill small gaps. White glue fillets won’t be as wide or rounded.
Smooth over the fillets with your finger a few times. The first time smooths the fillet and removes the bulk of the excess. Between smoothing, wipe your finger off on a damp paper towel. The second and third smoothing removes glue from outside the fillet area.
While the fillets dry, lay the model horizontally so the fillets won’t run or pool up at the end of the tube. Prop the rocket up and let the fins hang over the table edge. Don’t stand the rocket on it’s fins when the fillets are drying. After the first fillet dries, add a second fillet.
If white glue is used, launch lug fillets will almost always have bubbles.
TIP: Use the Titebond Molding and Trim Glue on launch lug fillets and there will be no bubbles when the fillet has dried!
LAUNCH LUGS
Single one-piece lugs are easy. Glue in place and sight from the rear making sure it is straight. Be careful not to get any glue inside the lug tube. Single lugs are usually glued near the center of gravity position (with largest recommended engine installed) on the rocket.
Some models use two smaller lugs, one at the top and on one the bottom of the body tube. It is important that both lugs be perfectly aligned or the model could get caught up on the launch rod.
To mount two smaller lugs in line: Draw a pencil line down the body tube making sure it is straight. Center the line between two fins.
Use a small amount of white glue and set the lower lug on the line. Don’t use much glue yet, you might need to remove and re-position the lug.
Lightly glue the upper lug in place. Sight down the two lugs from the rear. Because you used a small amount of glue you can move the lug and place the two in better alignment. Set a launch rod beside the lugs to check that both are in line.
When you are sure the lugs are right, follow up with glue fillets.
Continued on page 5- “PARACHUTES“

