Masking & Painting
GENERAL SPRAY PAINTING TIPS
As the old Centuri kits would say: “Start with light mist coats, THEN apply a heavy coat.
Not too heavy – the paint can run. That heavier final coat will give your models a “wet” look without having to polish. I never got enough paint on my models by spraying the recommended 12″ away. I spray from about 8″ from the surface.
For easier handling when spraying rockets, use a spraying wand. It’s a used engine casing glued over a ½” diameter dowel.
Automotive primer is sprayed before the white undercoat base. Grey primer is thick and will help fill any remaining surface imperfections. Spray the entire model, then sand lightly with 400 grit sandpaper. The primer also gets rid of any “fuzzies” left after sanding down the body tube seam filler.
TIP: Anytime your final color is light, for example – yellow, orange, light blue or fluorescent, be sure to use a white undercoat. Lighter colors tend to be a little more transparent. Imperfections and discoloration will show through.
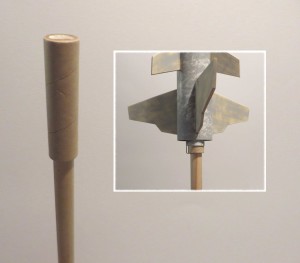
If you have not attached the nose cone yet and are painting it a different color:
Roll a piece of paper and insert it into the upper end of the tube to prevent paint from building up inside of the body tube. Paint build-up can make engines hard to fit and a nose cone shoulder stick.
COMPLEX MASKING TECHNIQUES
Complex scale models require complex masking. Just check out the painting pattern on a Saturn 1B. It requires planning ahead.
Where you can, pre-paint before gluing together. Anyone who has built a Saturn 1B has learned to paint the “cluster” arrangement of alternating black and white tubes before assembly. Masking afterwards is twice the effort.
If the model calls for complex masking, try some of the following ideas:
TIP: Use Scotch Brand Magic Clear Tape for masking!
I can’t recommend this tape enough. Use it once and you will agree. I got this tip from the Apogee Rockets website. www.apogeerockets.com
Mask off the color separation edges with Scotch tape first. Fill in larger areas with regular masking tape.
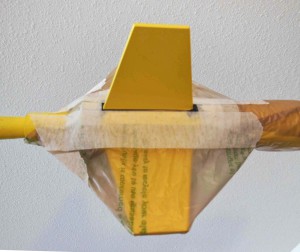
To cover larger areas, lay ½ of masking tape strip over the edge of larger paper sheets.
You can cover and mask the rest of the model by covering with a plastic bag.
For color trim pieces:
Try Monocote Trim self adhesive material. Simply cut stripes, or designs and stick into place. Just be sure of sure of the exact placement before burnishing down on the model surface.
Try some sheet vinyl available at sign shops. Sign shops don’t hand letter anymore, the letters are cut by computer, lifted from the sheet and stuck on a sign board. Ask for any scrap pieces, you could get it very cheap. The sign shops can even cut custom names for your larger models.
Save old decal sheets! I have cut and pieced together many custom decals over the years.
Continued on page 8 – “BUDGET ROCKETRY”

