Parachutes
PARACHUTE CONSTRUCTION
While most RTF (Ready-To-Fly) rockets come with pre-made chutes, the chances are that parachute won’t last long. Pre-made parachute material is sometimes too stiff and the shroud lines can to break and pull loose.
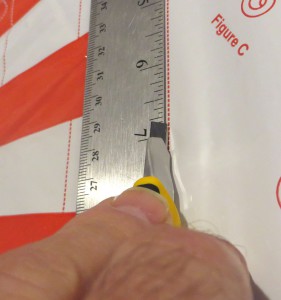
 TIP: If the kit has a parachute you assemble, don’t cut it out with scissors! Use your straight edge and X-Acto knife. Lay one side of the chute on your cutting board. Set your metal straight edge on the outside line of the chute. Cut on the line, using the metal edge as a knife guide. Cutting parachute material takes very little pressure with the knife.
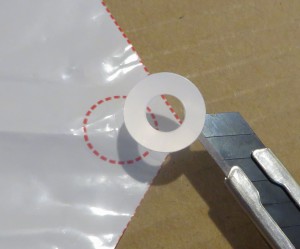
Don’t lift the pressure sensitive tape disks with your fingers! The oil from your fingers will diminish the stickiness of the tape disks.
TIP: Lift and set down the tape disks with the tip of your X-Acto knife.
You’ll find it easier and more accurate using the knife blade for positioning tape disks. You can see the disk location on the chute, fingers just get in the way.
Punch a small hole in the center of the tape disk. Tie the lines with a square knot. Use tweezers to help tie the knots.
When tying off the chute, the lines seldom end up being exactly the same length. Pinch the chute and two adjoining tape disks (back to back) between your thumb and forefinger of the left hand.
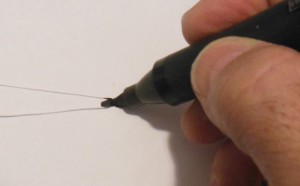
With the right hand, run the line between your fingers to the end. Mark the tip center of the bend with a Sharpie pen. Do the same with the remaining two lines.
With all three shroud lines bent and marked in the center, pull all three through the small eye of a snap swivel. The three loops go over the other end of the swivel and back around to the small eye. Don’t tighten the lines – yet.
Position all three shroud line marks together in the same spot on the swivel eye. You might need tweezers to adjust the lines and get the center marks in position. If all three marks are side by side, all six shroud lines will be the same length. Tighten the lines and secure the knot with a small drop of white glue.
Traditionally you simply open and snap the swivel over the screw eye at the nose cone. Some modeler’s tie a loop knot in the shock cord, 1/3 the way down from the nose cone, Attach the snap swivel and parachute to the loop
RECOMMENDED PARACHUTE SIZES
Information from: www.rocketchutes.com.
Simple rules of thumb for standard sport rockets:
0 – 2 oz. 12″
3 – 8 oz. 18″
9 -15 oz. 24″
16 – 23 oz. 30″
24 – 35 oz. 36″
36 – 47 oz. 42″
48 – 64 oz. 48″
Rockets 12″ and shorter – use streamer recovery or an 8″ chute.
Rockets 12″ to 18″ tall – use a 12″ chute.
Rockets 18″ to 24″ tall – use a 12″ or 18″ chute.
Rockets 24″ and taller – use a 18″ or 24″ chute.
SNAP SWIVELS
I recommend using snap swivels on all rockets. This way you can switch out chutes or streamers between models depending on your needs. Sometimes changing out an 18″ chute for an 12″ chute makes more sense on a windy day. Snap Swivels also help prevent tangles in shroud lines and shock cords.
Snap swivel sizes range from size 1 to size 12. 1 is the largest, 12 is the smallest. The 12 size is too small to be used in model rockets.
A good overall snap swivel size is “7”. You can buy a dozen for a dollar at WalMart. You’ll also find them in the fishing supplies department at sporting goods stores.
Regarding snap swivel sizes: • You could use a size 10 swivel (1″ long, end to end) for BT-5 and BT-20 models with small screw eyes. • Use a size 7 swivel (1.375″ long) for BT-20 through BT-55 models with medium screw eyes. • Use a size 3 swivel (1.875″ long) for BT-55 and larger models.
SCREW EYES
A 1″ long (overall length) screw eye, #114 is fine for most rockets. This size could be used for BT-5 through BT-55 diameter models.
A 1.375″long (overall length) screw eye, #208 could be used for BT-60 diameter and larger models.
Continue to Page 6: Recovery: Kevlar

