The Best Tools
THE SANDING BLOCK
A Sanding Block is a necessity for fin shaping, body tube ends, and nose cone shoulders. You can’t possibly sand the flat sides of fins (and keep them flat) using sandpaper over your fingers.
I suggest the Warner Drywall sanding block. It’s available online as the Warner #436.
I have owned many blocks over the years from homemade, X-Acto brand and various hard rubber styles. The Warner block is the best wooden block I’ve found and is cheaper and more durable than the X-Acto brand block.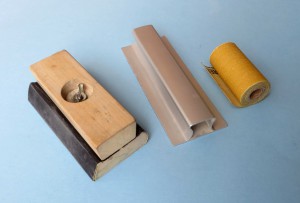
The Warner block conveniently holds a 1/4 sheet of sandpaper. Fold a full-size, new sandpaper sheet into quarters. Cut into four equal rectangular pieces using scissors.
TIP: Cutting sandpaper with scissors will also sharpen them! Only fine grit sandpaper, 320 grit or finer should be cut with scissors.
Unscrew the wing nut and hold the sand paper around the larger wedge of the block. Center the upper half of the block, set over the inset bolt and tighten down the wing nut. This locks the sandpaper into place. Don’t over tighten the wing nut – over time it could strip the bolt.
In addition to being a comfortable sanding block, the lower half of the block has a both rounded and wedge shaped sides. Both sides come in handy for contour sanding.
My new favorite tool is the aluminum Easy Touch Hand Sander from Great Planes. I use the 5 ½” long block, # GPMR6169. This is the most comfortable and stable sanding block available.
Great Planes sells self adhesive sandpaper rolls, the finest grit available from them is 220 grit.
Woodworkingshop.com sells 400 grit in self adhesive rolls, catalog #AR33040
In LPR model rocket building I go through a lot of 400 grit sandpaper. This is the extra fine, “Wet /Dry” paper. When using sanding sealer or Carpenter’s Wood Filler (CWF), anything rougher than 400 grit can sand through the treated surface down into the rough wood.
400 grit is the great all-around paper for most rocket construction. It will shape fins, dress up body tube ends, smooth a nose cone, and easily sand balsa fillers.
This article is primarily about balsa nose cone and finned rockets. Anytime basswood or plywood is used you will need to “step-up” to a rougher grade paper, 220 or 320 grit. For example, if you are shaping an airfoil into 1/4″ balsa stock you’ll want to start the rough form with 220. Then, change to 320 and finish out with 400 grit.
#11 HOBBY STYLE KNIFE BLADES
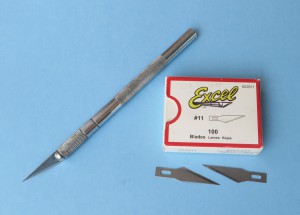
The hobby knife with a #11 blade is the “standard” for hobbyists. Use a #11 blade in a #1 size metal handle.
TIP: Order your blades in bulk and save!
Buying new blades in hobby or craft stores can cost from $.50 to $1.00 each.
I buy 100, #11 blades at a time from: www.modelexpo-online.com,, Item # EX22611
I can get 100 blades for $26.99 or .27 each!
TIP: Don’t bother buying a “chest” of assorted knives and blades. In the end you will use the #1 handle and #11 blade 90% of the time .
Sometimes you can find 100 packs of blades on Ebay for much less!
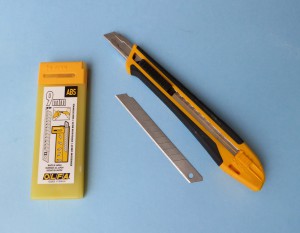
Today my go-to knife is the Alfa Break-Off blade.
Break-off blades are much cheaper and just as sharp as the X-Acto brand. When the tip gets dull, simply snap off the end and you have a new sharp blade.
The pointed X-Acto #11 blade is still best for making circular cuts. You can’t maneuver a flat blade around an arc cut.
STRAIGHT EDGE RULER
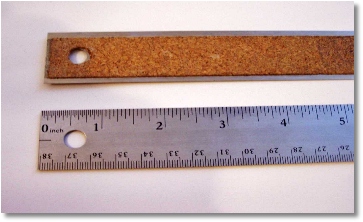
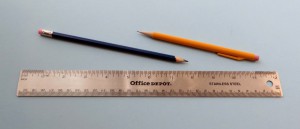 Buy at least a 12″ or longer metal straight edge ruler. Try to buy a straight edge with a cork backing strip. The cork backing will help keep the edge in place when cutting straight lines. Get a ruler style straightedge with both inch and metric markings.
 Many modeler’s use a 18″ (or shorter) piece of aluminum angle. The angle is a convenient trough for marking straight fin lines on a body tube.
Don’t use a wooden ruler to cut out fins. You will soon cut into the ruler with your blade. Even the wooden rulers with a metal edge aren’t usable for long. The metal strip always comes loose or gets bent.
TIP: When holding the straightedge with your free hand, keep your fingertips back and clear of the blade’s cutting line!
MASKING TAPES
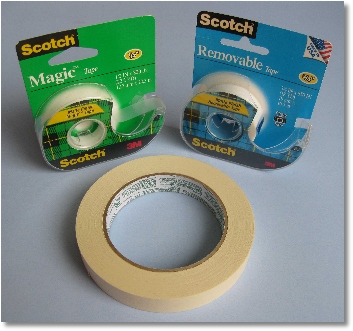
When I first started painting rockets I used the brown (painter’s) masking tape with mixed results. The lines were never as clean as I would have liked. Other times, the tape was too sticky and could pull up the underlying color.
Blue masking tape is better, but still not perfect. It didn’t pull off the base color but there could still be a rough line at the color separation.
Many builders use Tamiya tape with great results, but it is pricy.
My choice for masking tape (paint color separation lines) is not a masking tape at all. It’s simply Scotch Brand Magic Clear Tape. I would stay with the brand name brand Scotch Tape. A bargain brand may not stick as well. Look for the standard “Scotch” name in the green plaid package.
The edges of the plastic tape are straighter and cleaner than any brown or blue masking tape! Using the clear tape, I have the best masking lines/paint separation lines ever.
I first saw this suggestion on the ApogeeRockets.com website in their Peak Of Flight newsletter.
TIP: If your base surface isn’t smooth (orange peel or glue blobs) you’ll never get a clean line no matter what type of tape you use for masking!
TIP: Use a soft Q-Tip swab to press down and seal tape edges. A fingernail or pointed dowel could scar soft balsa.
Using any tape for masking will give mixed results when used around curved surfaces or in tight corners. It’s tough to mask over the top of a nose cone or at the body tube/fin joint. The Tamiya tape does conform to some curves. Take your time and insure the tape is adhering in all places before spraying.
White Glues & Super Glues
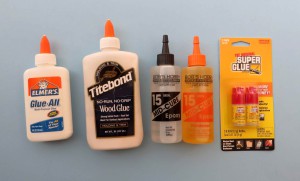
I use the old “standby” – Elmer’s White Glue for the bulk of my rocket construction. It dries clear where some other carpenter glues dry yellow. Don’t bother with School Glues. School Glues don’t have as strong a bond as regular white glue.
When making card stock shrouds or fin fillets – BE SURE YOUR HANDS AND FINGERS ARE CLEAN! Keep a damp paper towel handy to wipe off your fingers between making fin fillets.
SUPER GLUE
TIP: DO NOT USE SUPER GLUES TO ASSEMBLE MODEL ROCKETS!
Use white or yellow wood glue on engine mounts, fin and launch lug attachment. Super Glue will become brittle over time and major components can break off.
Super Glue (or CA glue) does have other uses in rocket construction.
TIP: Buy “Super Glue” in the smaller ½ oz bottle. Over time the plastic bottle will harden up and the tip will deteriorate. If you buy too large a bottle, you will be stuck with usable glue in a unusable dispenser.
I also buy medium thickness CA in small bottles at the Dollar Tree store.
TIP: Between builds, Super Glue will last much longer if kept in the refrigerator! If storing in the frige, be sure the bottle is supported in a upright position, not in the door. With everyone opening and closing the door it can fall over and drip glue everywhere.
Because this is “Instant” glue, you cannot re-position parts after bonding. I use Super Glue ONLY when the two parts can be tightly butted together (dry). Touch the nozzle tip to the joint then let the glue run down the joint.
The glue has a capillary action, it will run and seek out open areas between the two pieces. It will not fill a gap between the two pieces to be glued! If there is a gap at the joint, you should use a slower drying, gap filling super glue. The bottle label will designate what type of glue it is.
Titebond No-Run, No-Drip Glue (also known as Molding and Trim Glue) is great for fin and launch lug fillets. This glue is thick and after it dries you’ll find no bubbles in the fillets around launch lugs.
Two part epoxy glues are used more in Mid and High Power Rocketry.
White glue is thinner than it used to be. When using thin white glue, engine mounts and couplers can freeze and lock up in the wrong position!
TIP: Play it safe and use the slippery epoxies when gluing in engine mounts and red couplers.
Before using glue, dry fit couplers and sand until you get a slip fit before using glue.
ELMER’S WOOD FILLER
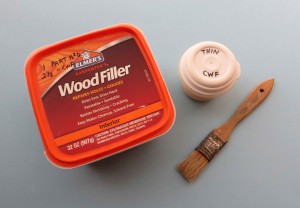
Previously sold as Fill N’ Finish. (Elmer’s has quit making the FNF formulation in late 2007.) The new product name is “Elmer’s Carpenter’s Wood Filler”, or CWF. The product tub container is still the same. The old product was meant for wood filling. The new product is formulated for outdoor use. Carpenter’s Wood Filler is an amazing balsa filling material. It also preps the wood so the balsa won’t soak up as much paint.
TIP: Stay away from the “MAX” or “Stainable / Sandable” type. It’s thicker and very hard to sand. Look for the orange tub shown above.
I now prefer CWF over the old standby of Sanding Sealer. I typically sand the CWF balsa surfaces with 400 grit sandpaper. The CWF won’t load up and clog 400 grit sandpaper like Sanding Sealer can. The sandpaper will last much longer. There are no paint odors with CWF. You can fill wood surfaces indoors without fumes.
You can find it at Super WalMart or online. Make the CWF mixture in a airtight Tupperware style container. Don’t try to mix up the entire new container at one time. If your container is airtight, you can use it as you need it, it shouldn’t dry out. Close and seal after each use.
If it does get too thick, add a little water and mix back to a thick cream consistency. You should be able to paint on the CWF mixture using a brush.
TIP: A good starter mix ratio is 2 1/2 parts of CWF to one part of water. This should give you an easy brush on mix. Experiment until it paints easily without lumps or too many brush marks.
SAVE CARDBOARD!
Save your corrugated cardboard shipping boxes and cartons. I use them for cutting boards and backing boards for spraying small parts.
Cut the cardboard boxes into smaller “flats.” A good, workable size board will be around 12″ x 18″. I cut balsa, shroud lines, shock cords and parachutes on the cardboard sheets.
Sometimes I’ll primer spray fins before glueing them on the body tube. Masking tape is set down sticky side up and the fins are stuck down flat on the tape. I spray one side and let dry. Flip over the fin and spray the other side.
Continued on page 3- “BUILDING TIPS” – Starting That New Rocket!
